|
|
It's already late January, and I haven't been able to do a fraction of what I was supposed to. The tent has taken a long time to make and I have had a lot of work. But now the time has come to fix the engine.
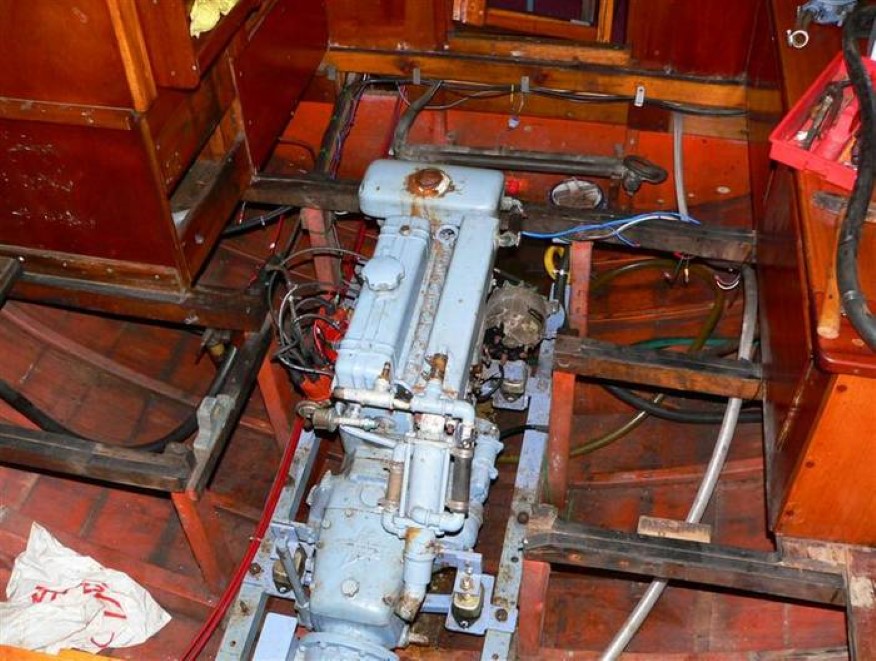
The removal was easy, there is plenty of space around the engine, and because I had it loosened to mount the new vibration dampers last spring, the bolts were easy to remove. It took half an hour, then it was ready to be lifted out with the crane.
I'm anxious to see the condition of the parts of the engine as I take it apart - after all the engine is 55 years old, so there inevitably will be some wear. I was especially anxious to see the timing gear; were they the source of the rattling sound - and yes, I'm pretty sure they were. The fiber wheel is very worn, there was 0.5 - 1 mm of slack and the shape of the teeth is wrong. The new timing gear is now mounted, which was pretty easy - the cogs are marked, so it's just making sure the marks fit together.
|
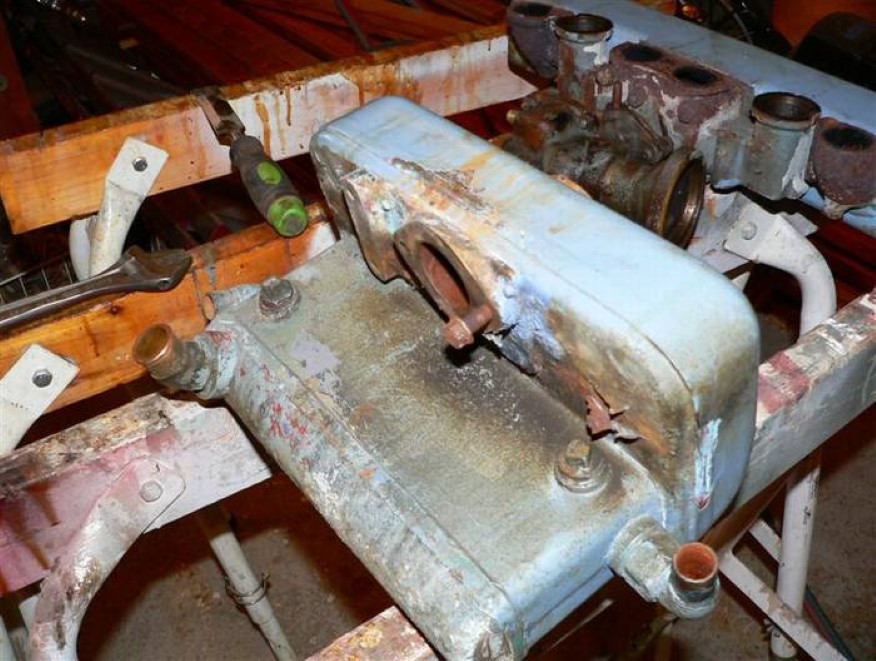
Another thing I was anxious about was whether the heat exchanger, which is leaking, could be repaired. The leakage only occurs when the heat exchanger gets hot, and because of the construction it is unfortunately impossible to find the leakage, and a repair just as impossible. So I need a new one - what a bummer!
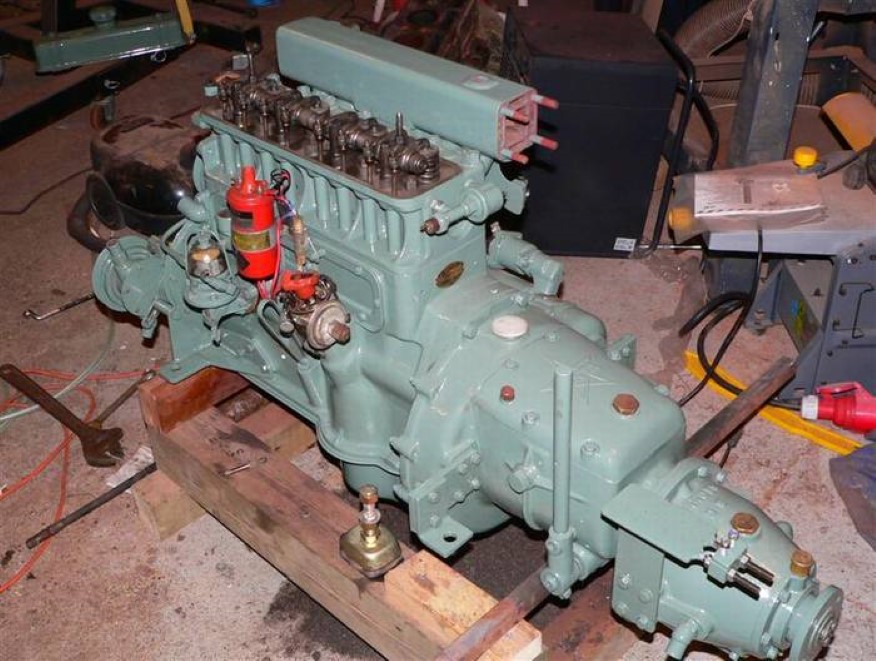
The cylinder head is now removed and everything looks very nice. There is no edge in the cylinders, however, there are clear traces of honing. So the pistons have been out of the engine not so long ago, as the very low oil consumption (nothing) and the fine oil pressure also indicate, so the engine has probably been rebuilt at some point. Now that the cylinder head has been removed, I have the opportunity to take a closer look at the plate that was placed under the cylinder head, and I came to wonder if the engine was actually designed like this from the factory. And yes, it's a BB43F (F for fotogen, which is the Swedish name for kerosene). The engine type was made for both petrol and kerosene, with the BB43B gasoline engine having a compression ratio of 7.5: 1 and 40 hp, the BB43F kerosene engine having a compression ratio of 5: 1 and 25 hp. To convert the engine to the gasoline version, the copper plate will not be mounted again and the cylinder head studs and pushrods will have to be replaced with shorter versions from a gasoline engine.
Some may think it is a bit brutal to expose an old engine to such an increase in power, but I'm pretty sure it won't do any damage considering the good condition of the bearings, and the extra power will be nice to have, just as the gasoline economy probably will be improved. 40 hp is not much for a 1.4 liter petrol engine, and it will never do any hard work.
The removal of rust and old paint is fast moving forward. I now have only the cylinder head and seawater pump left to clean. I also renovated the carburetor and made it look nice - it is a cast iron carburetor, so it had to be painted as well. New seals and float valve are installed, and everything has been looked after and cleaned.
|
May 29, 2008:
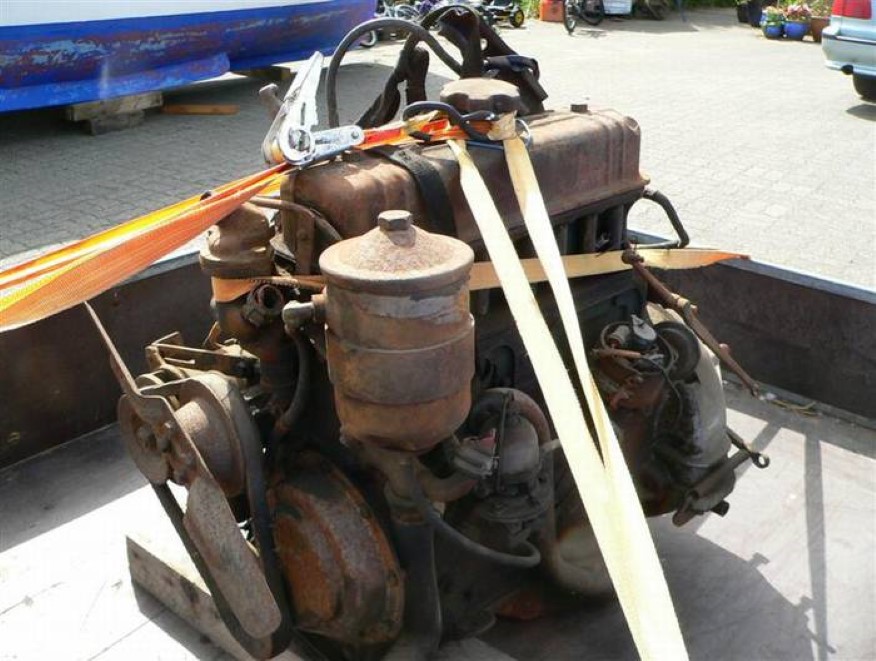
Hurray, I did it! For a long time, I have been looking for a Volvo B4B engine, from a Volvo PV444 car, and I just bought an old rusty one from 1954 for DKK 1000, which I think is OK despite that it can't turn. But there are the spare parts I need, such as short pushrods and cylinder head studs, an oil filter (not present on a BB43) as well as lots of screws. What else can be used from the engine I consider a bonus.
I also got hold of a heat exchanger, a small Bowman exchanger, brand new and unused for DKK 2000, - January 5, 2009:
It has been dog-cold during the Christmas holidays, so I have chosen to stay inside the garage and work on the engine. I began by disassembling the old B4B, because I needed the cylinder head studs and pushrods. There is a difference of approx. 8 mm between the kerosene versions and the gasoline versions of the studs and pushrods. It was quite easy to take apart, and not as rusty as I expected except for the pistons - they are just stuck! But that is not important, I have the parts I needed.
|
I had expected to use the oil filter from the B4B on my engine, but unfortunately, I had to give it up. The plug that sits at the front of the engine is completely stuck - it's a small iron plug with a square hole in it, and I can't get it to turn. I dare not use heat on the block where the plug is placed - because of the oil ducts and bolt holes there is not much material right there; I'm afraid the engine block will crack. But what the heck - it has been running for 55 years without an oil filter, so it can probably keep on doing it.
Before I could mount the cylinder head and front plate, the parts had to be primed, so I made a spray booth out of plastic in order to keep the garage free of paint dust.
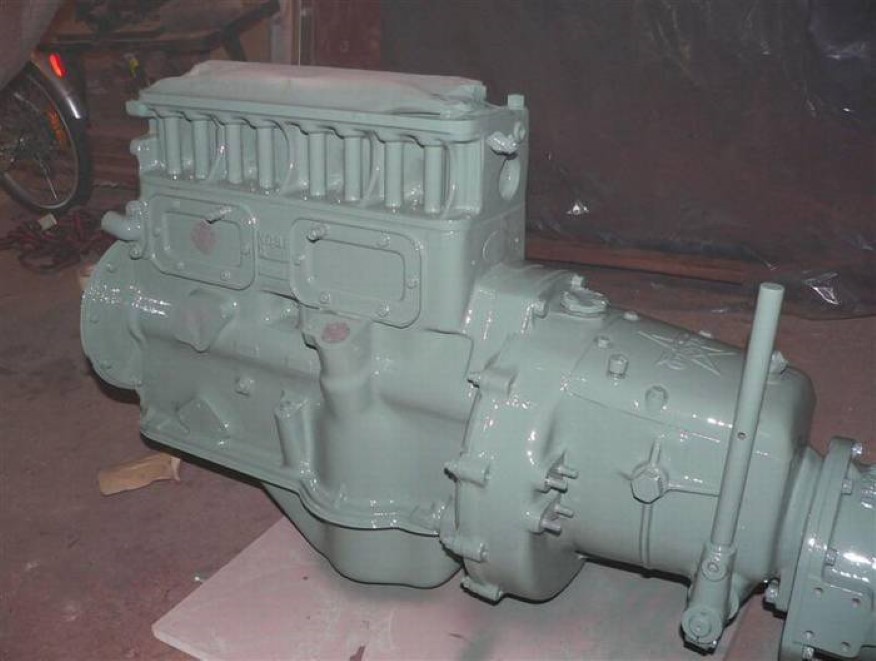
So the status at the time of writing is that the cylinder head and front plate are mounted and the engine and most of the parts are painted. Now it just needs some time to dry before I can assemble it.
|
January 11, 2009:
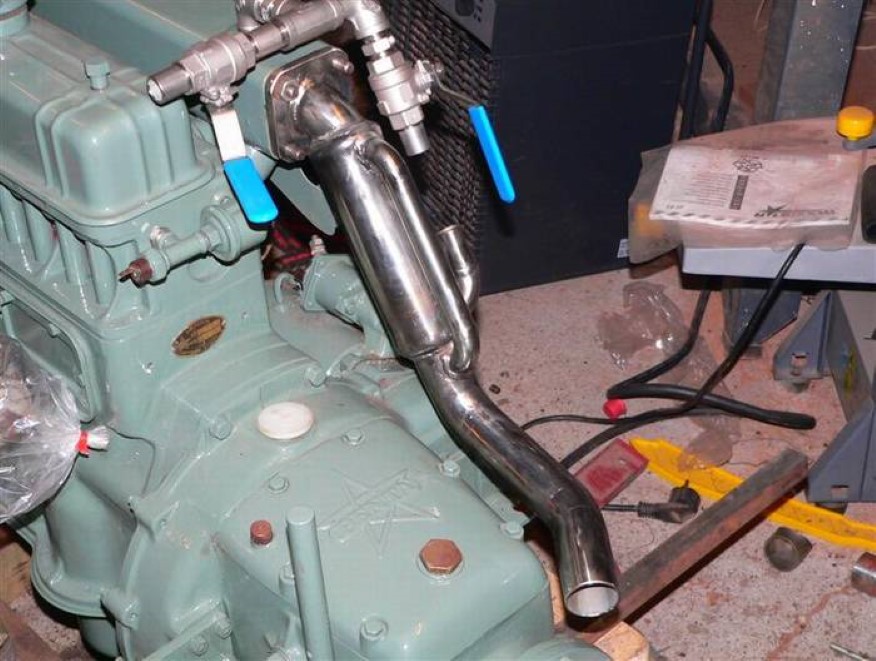
It's now starting to look like an engine again, most of the parts are now painted and mounted, I only need a few bolts for the outer pulley as well as polish up the generator and mount it. I just need to get the generator pulley off, because it is very rusty, and then I think I'll spray paint the generator itself with some silver-gray - then it no longer corrodes. I also still have to make a socket for the new heat exchanger as well as the new exhaust bend. January 18, 2009: I've been welding a bit, and have now made the new exhaust
|
bend and the heat exchanger socket. I have made the exhaust bend out of 42 mm stainless tube with a 60 mm tubing sheath. To make sure the jacket is filled with water, the inlet is at the bottom and the outlet is at the top. Inlets and outlets are made of 22 mm stainless steel pipe. I also put a socket for the heat exchanger together, but since it will not be exposed to anything other than coolant, it is made out of common black iron.
I painted the parts yesterday, and this afternoon I assembled it all - I now only need to adjust the valves and ignition, fill the engine with oil, and coolant and mount the engine suspensions. I need two engine suspensions, but they are ordered. So I can't start it until next week.
|
 Click on the picture to see the video
January 24, 2009:
So finally - I got the engine started and it runs like a clock - no knocking or rattling from the timing gears or any other bad noise. It is actually very quiet - it will be nice. The new heat exchanger works as intended and has no problems keeping the temperature down. But the water pump, which I replaced last year, was leaking. It is incredible, it has only been running for one season, and it irritates me that such a new part is defective. But there is nothing else to do but order a new one for DKK 1249 and have it painted and fitted. Damn!
I have also added an air filter, not so much to clean the air, more because of the noise dampening effect. I searched for a usable new filter on the web, but it was impossible to find, so I had to resort to the scrap yard. I spent an hour and DKK 100 on finding a usable filter from a Suzuki Alto that could be fitted, as well as various air-hoses. And it works - the suction noise is gone.
I made a small video where you can hear the engine run. Click on the above picture to watch it.
February 15, 2009:
Today I have had the engine running for an hour to get it up to operating temperature. This was necessary for adjusting the valves and for the cylinder head to settle in. It is now tightened to 8.5 kpm and the engine is now ready to be put back in the boat.
Here are some pictures from the process:
|
|
|
|