|
|
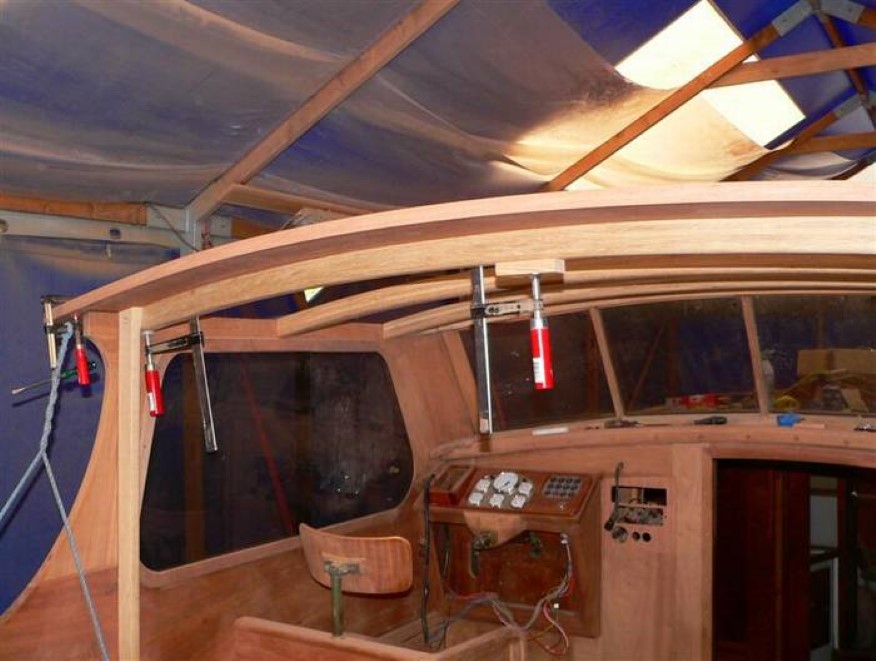
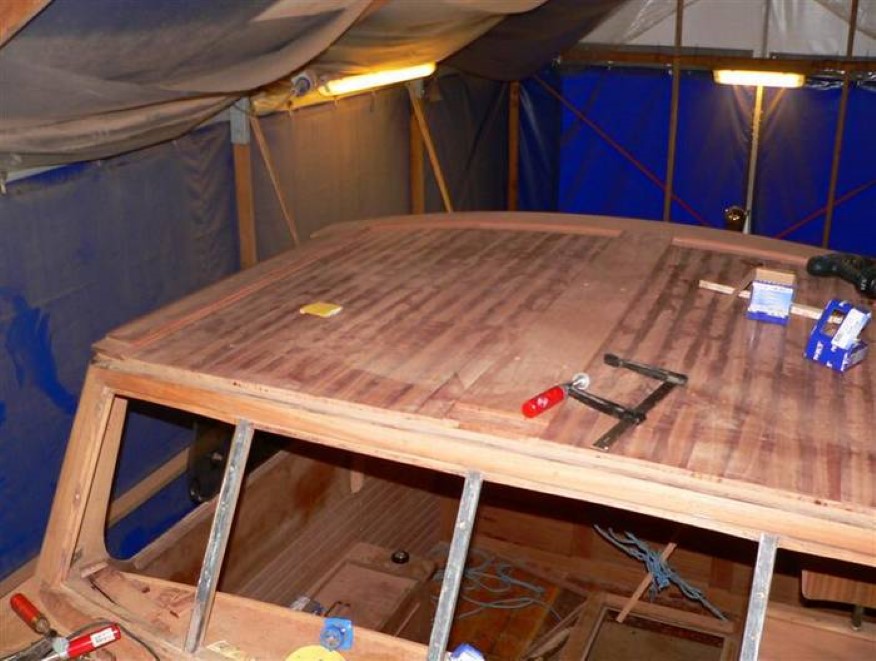
Finally, the time has come for the last stage of the woodwork on the superstructure. I want to make the roof as a sandwich of 12 mm mahogany planks at the bottom, 3.2 mm oil-hardened Masonite in the middle, and 10 mm iroko planks at the top. The edges will be 155 mm mahogany planks, and the width difference will be evened out with a mahogany wedge in the center.. The wide plank in the aft end is glued together in the right shape of 3 8.5 x 205 mm planks - I can not handle such dimensions with the tools I have at my disposal, so I had them cut and planed at a carpenter shop. I glued the thin planks in the same template that I used for the beams, so the result was a curved plank of 26 x 205 mm. Subsequently, I used the router to make the roundings. You can see the result in the photos below.
|
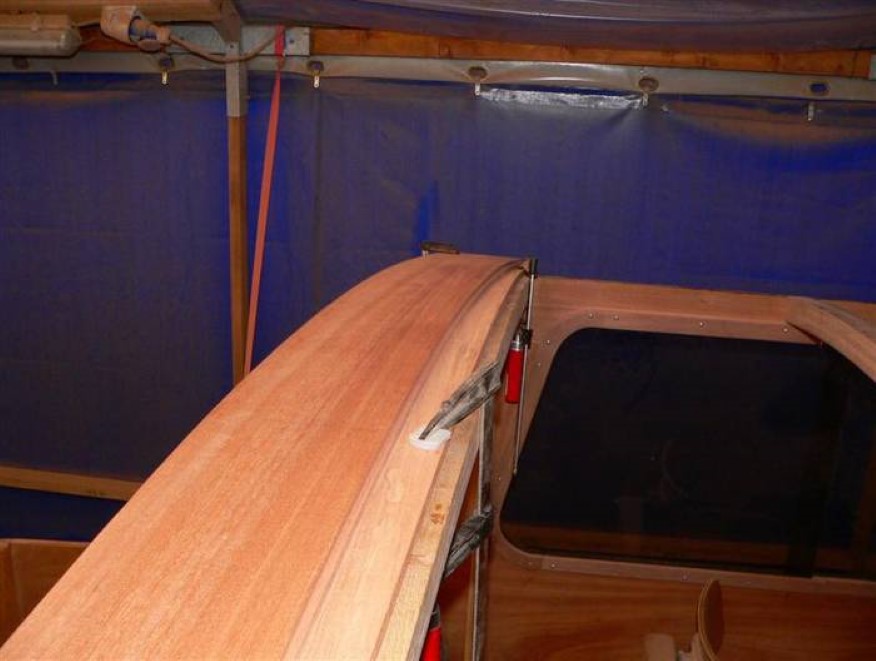
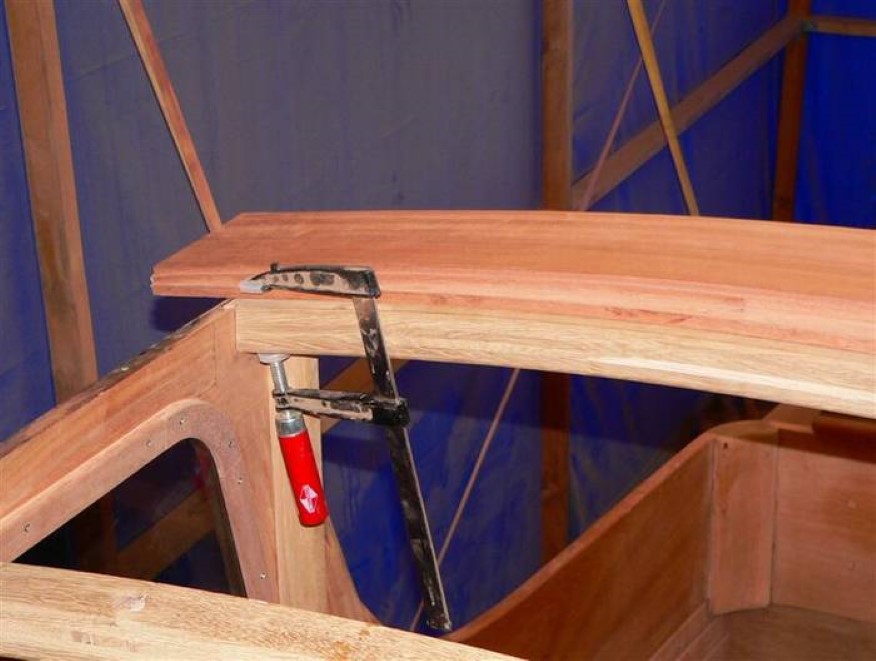
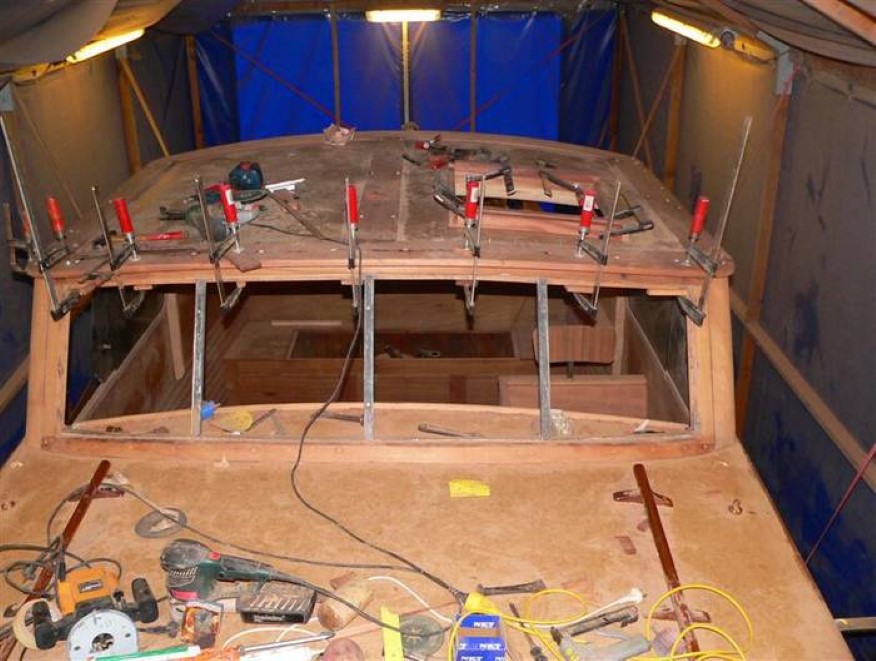
August 8, 2009 Now it's starting to look like a roof - the sides are fitted and I've just finished adjusting the fore plank.
|
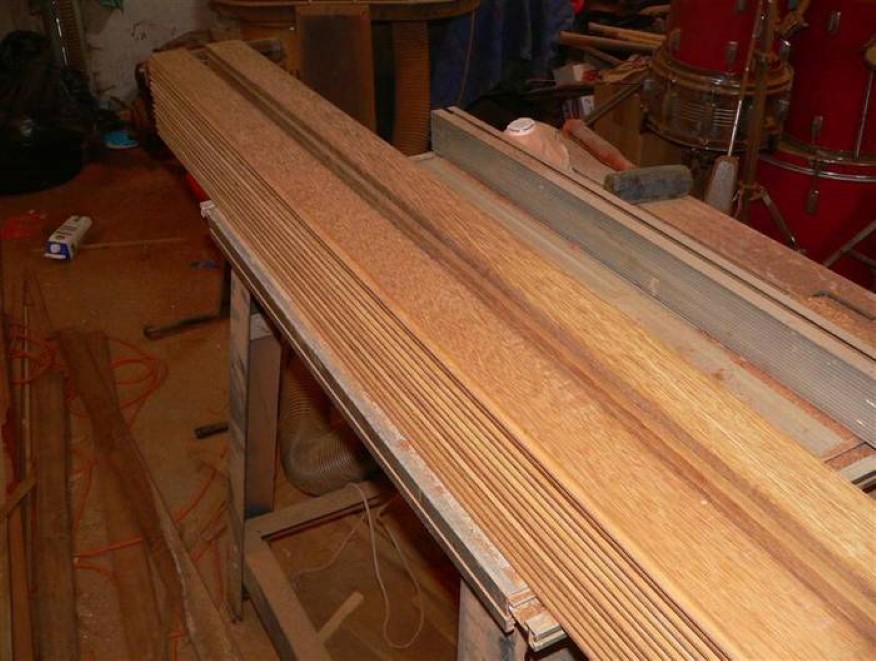
The fore plank is glued together by 17 strips of 10 x 25 mm, all cut from the same plank, and put in the same order to make the wood grain look right. You can hardly see that the plank is laminated. It was quite a hassle to perform the gluing, the plank curves more than 30 cm, and before I got the whole thing in place, the glue was almost getting too dry. But it was a success although I had to make it a little thinner than originally planned. I used the router to mill down the bottom of the plank so there is 100 mm in full-thickness and 55 mm in 9 mm thickness - that is 155 mm in total. To make the adjustment on the boat easier, I made a template of the inner rounding so I could cut off the sides and the center-wedge. For the final assembly, I clamped the plank down in place and drew a line for the final cut.
|
August 16, 2009
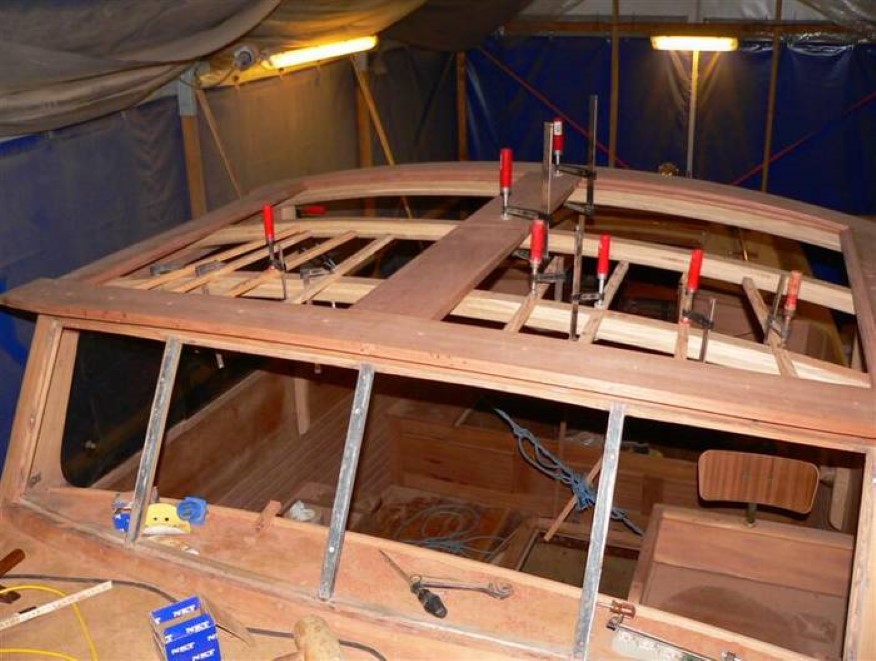
The main part of this week has been spent cutting the mahogany planks for the roof, planing, milling, grinding and saturating them with Owatrol oil. I had to make them 2 mm narrower at one end, otherwise, the center-wedge would be too slanted. Since I do not have a roller guide for my table saw, I had to cut them by hand - I'll do the same with the iroko planks. The planks were cut out of a piece of mahogany of 65 x 150 x 4300 mm. But now the planks are in place and the center-wedge is cut to size. The next thing will be to cut the iroko planks - I have 3 pieces of 150 x 65 x 1500 mm, so it should be just enough. The planks will be 9 mm thick, 63 mm wide at one end, and 61 mm at the other. I'll make a 6 mm for the caulking on one side with the router.
|
August 23, 2009:
I finally finished cutting the wood up to the roof - it was a boring piece of work that just had to be done. Iroko behaves a bit strangely; when the wood is freshly cut, it has a very light color - almost like oak. But when it's exposed to sunlight, it gets very dark within a few days. It is not particularly easy to work with, it tears easily - I had to go backwards with the router while milling the edges, otherwise, the edges would have become very ugly. I have also cut the edges of the mahogany planks and rounded them, and have also had the 3 of them fitted. The fore plank will be on top of the Masonite slap has been installed, so that will have to wait. I have now started making the new hatch.
|
August 30, 2009:
This week has been spent mounting the Masonite plates and adjusting the hatch frame. I have glued the Masonite with thickened epoxy on all edges, and with Tec7 on all the mahogany planks. In addition, there is fastened with stainless steel clamps. The idea is that the Masonite will be completely waterproof, so even if there should be a leak in the joints between the iroko planks, the roof will still be waterproof, and both the Masonite and the iroko should be able to withstand it. The hatch is also made so that it is partly on top of the Masonite. It is made so it looks like the hatch on the foredeck, ie with semi-circular frames at the front and aft. The frame almost finished now, I just need to make the semi-round ends. This weekend I also fitted the fore plank - a bit of a hassle, but I managed to get it fastened in place. I have glued it with epoxy, so it will hopefully stay in shape when the clamps come off. So now I just need to sand it, then the edges are done.
|
September 6, 2009:
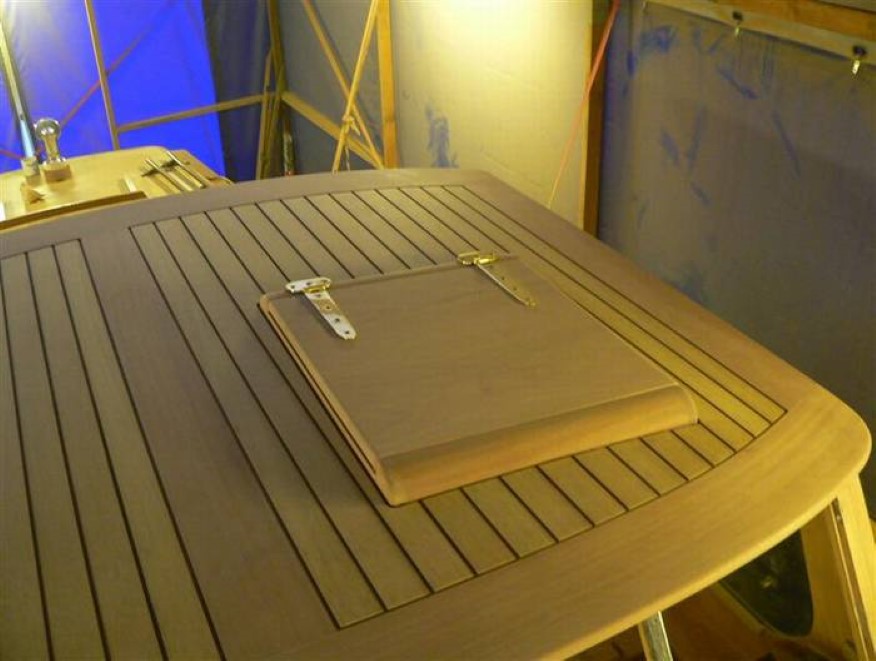
Now I'm starting to see the end of the woodwork - the edges have been sanded, the hatch is finished and fitted and half of the iroko has been put on.
I had quite a bit of trouble making the round ends of the hatch frame fit, I had no choice but to plan them by hand. But I succeeded in the end. I had to make a couple of brackets under the hinges to get them up to level - not the most streamlined solution, but I could not get other types of hinges than the T-shaped. The hatch is made with 5 mm water noses all the way around, so there won't be any gaskets. In order to make it easy to fit the iroko planks, I moved my pad grinder out onto the boat. It is an absolutely indispensable tool - in principle an electric motor with a 350 mm grinding wheel and a plane - which saves a lot of time when adjusting joints. I also moved my drill press to the boat, so I could drill holes for the plugs on site. I mounted the rods with 2 screws in each beam and Tec7 as glue. The starboard side was easy to make as it only was straight planks - the port side was more difficult because of the hatch.
|
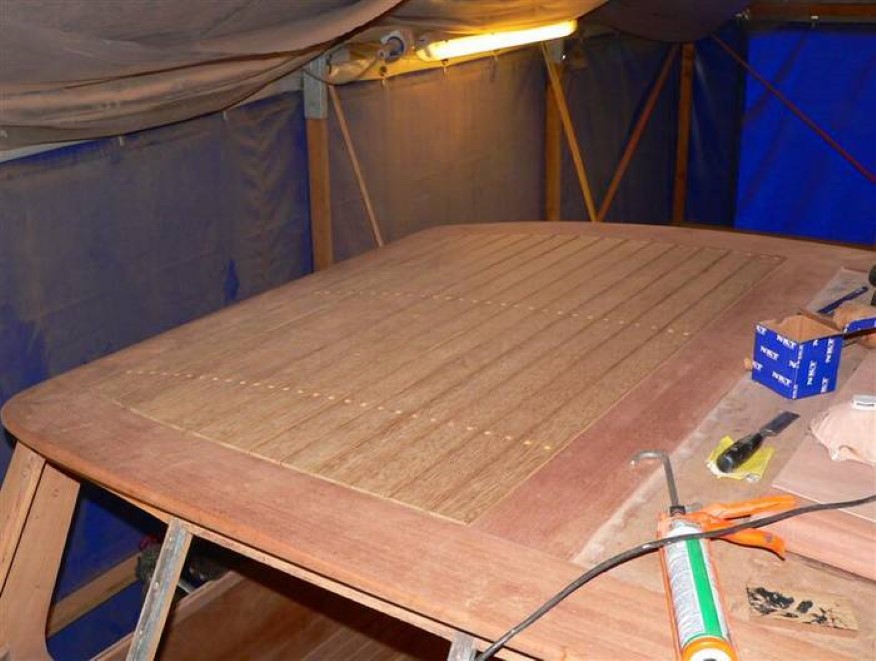
September 14, 2009:
The new roof is now finished. I managed to make all the iroko sticks without any mistakes - which was necessary, as I don't have any more iroko. It was a hassle to make it fit around the hatch, but I'm quite happy with the result. This weekend I have sanded the whole roof, so now it just needs to be caulked.
|
|
|
|